If these instructions don't match the version of Microsoft Publisher installed on your machine, you may want to try using Google to find more appropriate directions.
By default, publisher will save your file as an 8.5” x 11” document. This is inconvenient if you are trying to save it as a 4.25” x 6”, 5” x 8” or other sized document. Follow these steps to publish a properly sized document. This example uses 4.25” x 6” as an example. Change the height and width to the correct measurements in step 6 if you are using a differently sized mailpiece.
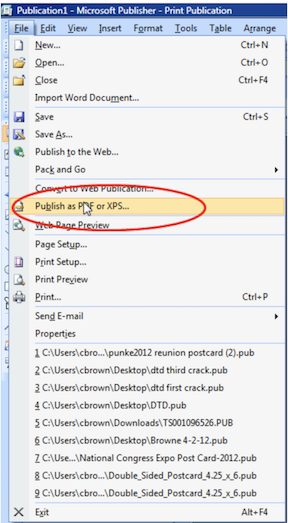
1. From your open document, select “File” and click “Publish as PDF or XPS”.

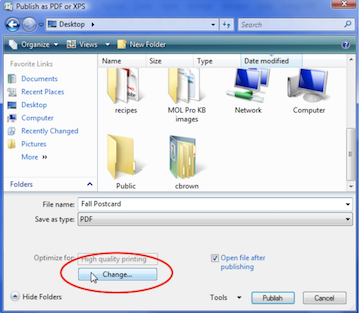
2. Select the proper location for the PDF to be saved. I’m saving this example to my desktop. Ensure “PDF” is selected from the “Save as type” field. Click the Optimize for “Change” button under the Save as type dropdown.

3. Ensure that High Quality Printing and click “Print Options”.

4. From “Printing Options, click “One page per sheet”. From Orientation, click “Landscape”.

5. From the “Paper” section, click on the “Size” menu and select “Custom”.

6. Change the “Width” to “6.0” and the “Height” to “4.25” (if using a bleed, add .50 to the measurements, for example, 6.5 and 4.75). Click “OK” to proceed.

7. Click “OK” to close the Publish Options window.

8. Click “Publish”.

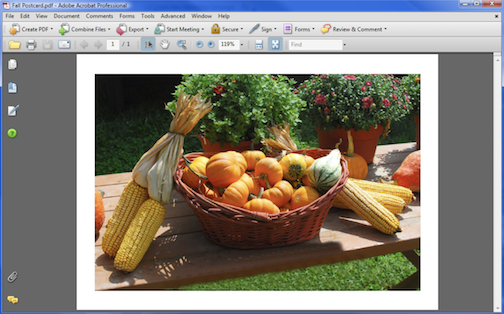
9. Your PDF will now open.

Carly Brown
Comments